TYAN has an excellent built-in Remote Management Module (RMM) that does not require an extra license like some Tier 1 vendors do.
TYAN Default Administrator Username and Password
The default TYAN username and password is:
- Username: root
- Password: superuser
The first thing we do when we sign in is create a new administrator user, set its password, log off, then log back on again with the new admin user, and finally _disable_ the default root admin user.
As a just-in-case prior to disabling we changed the root password and recorded it.
BIOS and Firmware
Once the system is built and plugged in, the first thing to do is to update the BIOS and firmware. Fortunately, that can be done from within the RMM which is a nice change from needing to boot into EFI to do so.
So, after running the above steps we click Maintenance then Firmware Update.
TYAN RMM Console: Firmware Update
Choose the Flash option:
Flash BMC or BIOS Firmware
From there choose the BIOS or Firmware file and click Start firmware update:
File Choice and Update Start
The process will start:
Firmware Update – Processing
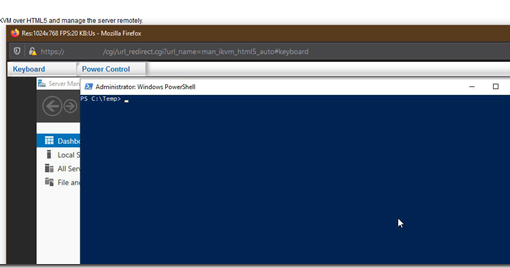
Once both updates are complete, we need to tweak the HTML5 console a bit before powering the server down.
KVM/IP HTML5 Console Tip
Click on Remote Control in the left hand column.
TYAN KVM/IP Console
Click on the red power button to fire the server up.
As soon as the server becomes active, the Hot Keys button should activate.
Click on the button then click on Add Hot Keys.
Hot Keys –> Add Hot Keys
In the dialogue box that pops up we need to set up the following:
- Enter BIOS: F2
- Enter Boot Menu: F11
Hot Keys –> Add Macro
Because the KVM/IP is HTML five the function keys do not represent key strokes _to the console_ but calls to the _browser_. So, we need to set up the above to get into the BIOS or Boot Menu.
Press the needed key then the Insert button and repeat for the other needed key(s).
TYAN Downloads
We are now ready to boot into the Windows Server OS installer flash drive that’s attached to the server and set up our cluster nodes.
Make sure to download …
- the BIOS/Firmware Files
- the AMD EPYC Drivers for the product
- the User Guide (UG), AST2500 User Guide (UG), Quick Install Guide (MODEL_QIG)
On the Product Page scroll down to find the Downloads tab:
TYAN Product Specification/Docs/Support/Downloads tabs
Conclusion
Once we have done the above we can F2 into the BIOS and configure our required settings.
For now, we’re new to the AMD EPYC platform, so some of the AMD specific settings for the EPYC CPU are an unknown. We will be leaving them as is until we’re well into our initial testing.
We’re pretty excited here about what’s happening in the AMD world. There’s lots of potential there.
AMD’s impact on the CPU market is already seen. Intel released “R” code, that is Refresh, Intel Xeon Scalable CPUs for what is to us the first time ever.
It just goes to show, competition is a very _good_ thing! 🙂
Stay safe and healthy everyone and thanks for reading!
Philip Elder
Microsoft High Availability MVP
MPECS Inc.
www.s2d.rocks !
Our Web Site


